How to deploy your own Joplin Server-instance with Docker
Using your data on any device is standard these days. Controlling where this data is stored is another story — in terms of Joplin, you can…

Using your data on any device is standard these days. Controlling where this data is stored is another story — in terms of Joplin, you can use many platforms to synchronize your data: One of them is Joplin Server which is quite easy to deploy — so let’s look at that kind of implementation!
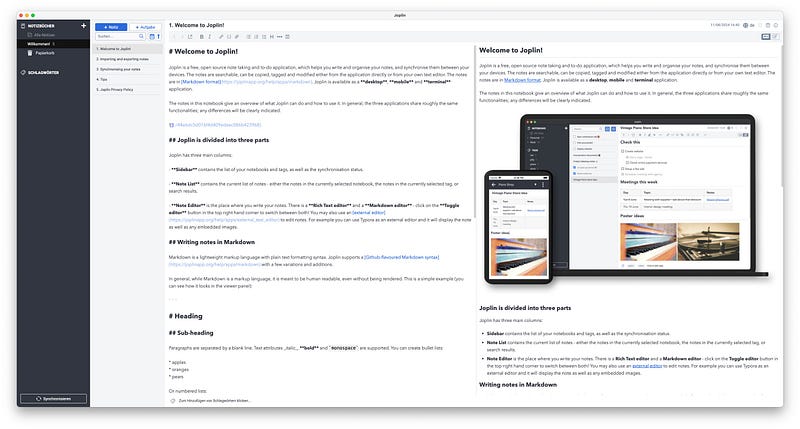
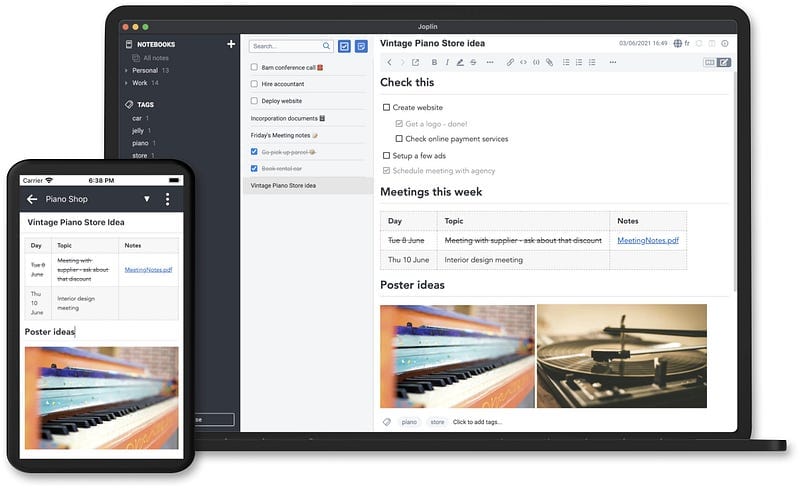
Joplin is a free Open Source note-taking and task management application that can handle large numbers of notes organized into notebooks. The notes are searchable, can be copied, tagged and modified either directly from the applications or from your own text editor. The notes are in Markdown format and clients for all modern Operating Systems (Desktop and Mobile) are available.
While Joplin makes it easy to synchronize notebooks and data with various private and public cloud services and (of course) their own designated Joplin Cloud, it is also possible to host your own sync server with a little help from Docker. Even though the connection to it is still officially in beta, this tutorial will show you how to set up your own Joplin Server in no time. In the given use case, I host a small Debian-based VPS at home (continuing the #selfhosted trend) and use the Nginx Proxy Manager (NPM) to take care of reverse proxying and issuing the desired SSL certificate. All you additionally need is a (sub)domain and open ports 80/tcp and 443/tcp properly forwarded to your server’s internal IP.
Installing the Server
After installing our favorite Linux-distribution to build the foundation for our Joplin Server (just assuming it is Debian in this specific case)
- Install the latest Docker-engine according to https://docs.docker.com/engine/install/
- Create a directory in, for example,
/optand name itjoplin-serverso that the basic path/opt/joplin-serverexists. Create a directorydbin it - Docker will put its data stored in a PostgreSQL-database therein - Change to the directory and create the docker-compose.yml-file with the sample contents from https://github.com/OliverPifferi/synology/blob/5a677327818a5edc80ff122c1d30d2ad7f5510f1/portainer/stack_joplin_server.yaml — changes values in the files should be obligatory!
- Fire up the containers by typing
docker compose up -d
Check that both containers are running by typing a docker ps or check their logs using the docker logs <container-id>- command. Don't worry if the service isn't ready yet, it may take some time to spin up the containers and create the database, depending on your system.
Configuring the reverse proxy
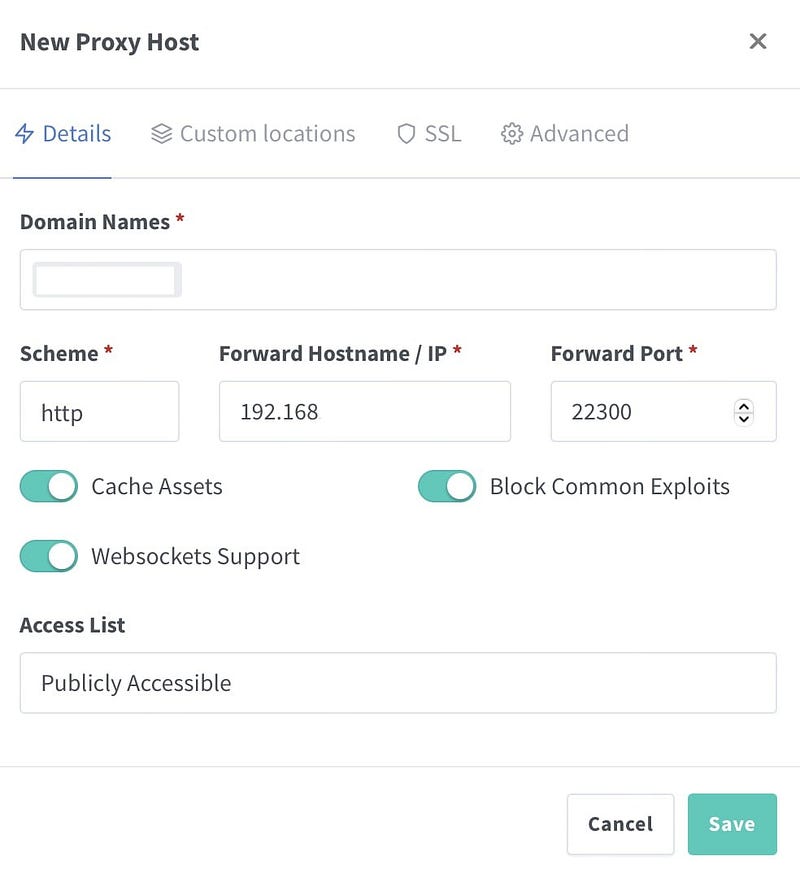
Once the services have been deployed on the target system (or while this is happening), we will deal with the reverse proxy so that we can access and manage the server via an https-URL. To do this, simply log into the Nginx Proxy Manager, select „Proxy Hosts“ and then „Add Proxy Host“. A new window will appear where you need to enter the appropriate domain name (e.g. joplin.mydomain.tld), the scheme, the forward hostname/IP and the destination port. The scheme is http, the port is 22300 as configured in the docker-compose.yml file, and the IP is the internal destination IP of the VPS running the Joplin Server. Check the switches shown for caching assets, blocking common exploits and web sockets support and click ‘Save’.
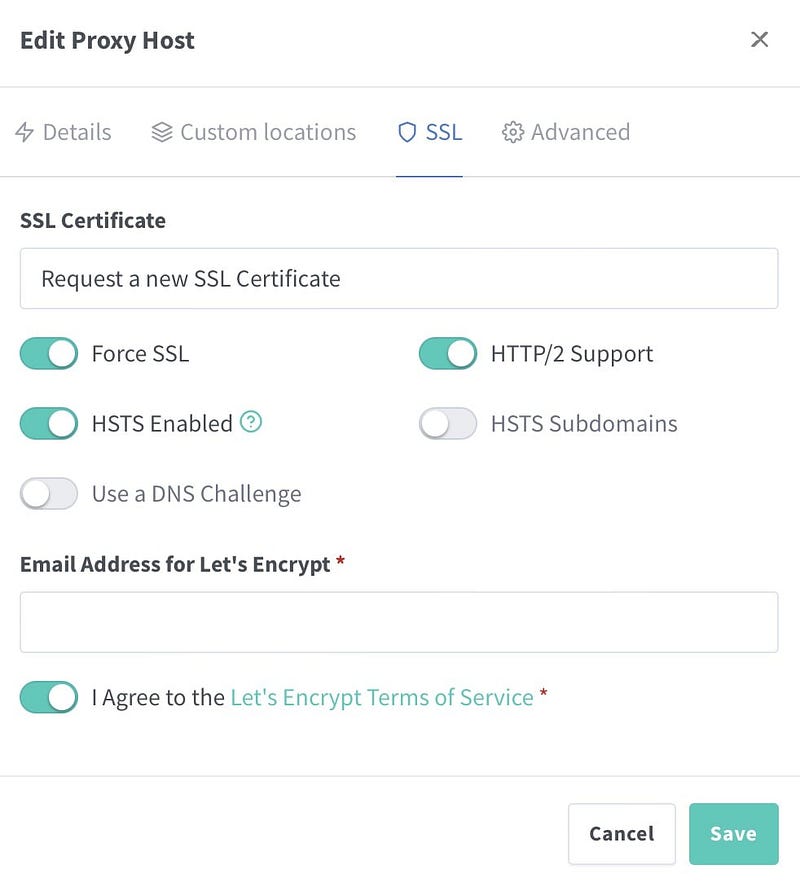
Once the host has been created, edit it and go to the SSL tab. Select “Request a new SSL certificate” and tick the “Force SSL”, “HTTP/2 support” and “HSTS enabled” boxes — then click “Save” and, once the certificate has been retrieved, you’re ready to go.
Dealing with the server
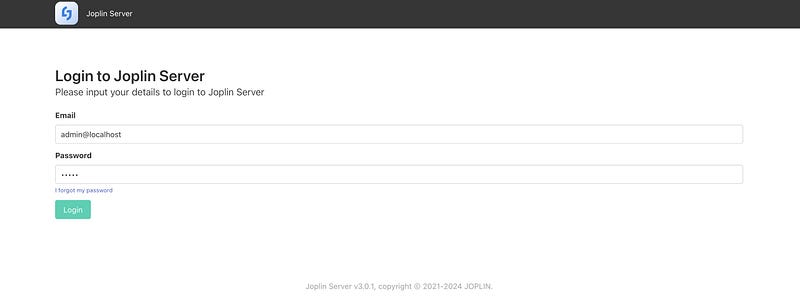
After the initial installation, point your browser to your Joplin server instance via https://joplin.mydomain.tld — according to the (sub)domain you chose earlier, of course. Use admin@localhost as the initial login and admin as the initial password and change these to more secure values after the first login. Under the „Admin“-section you will find various options, including the „Users“-section where you can create your first individual user for your Joplin desktop or mobile client. Remember or write down your password and email address!
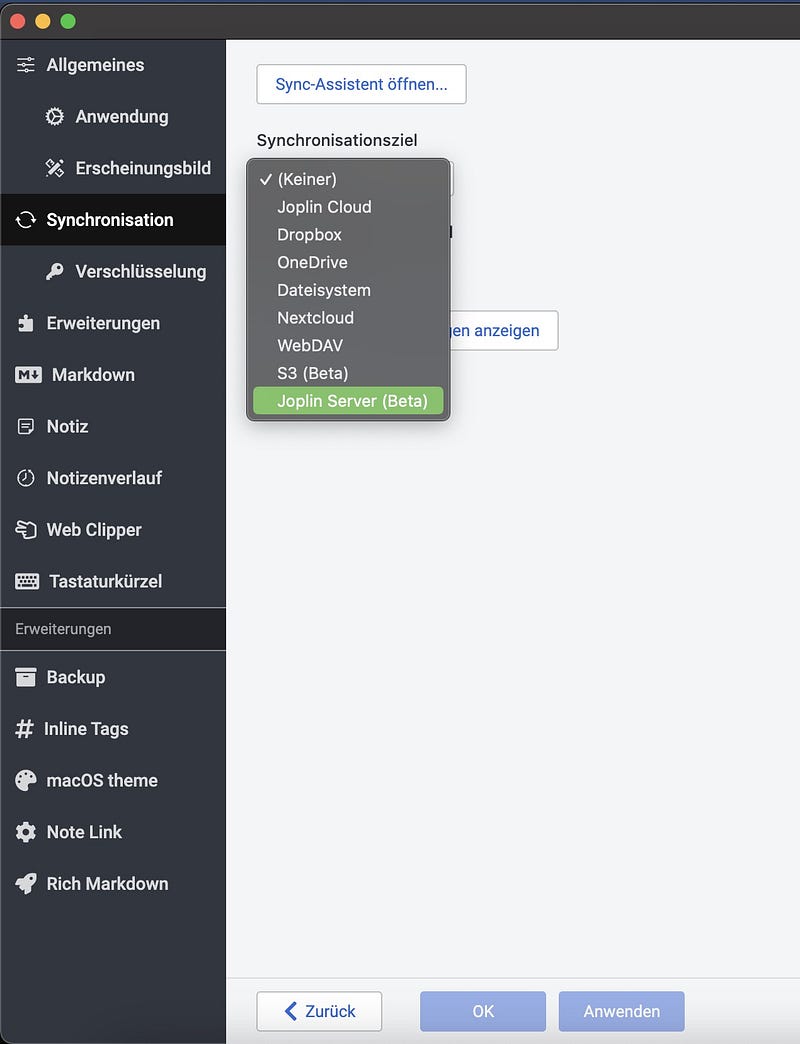
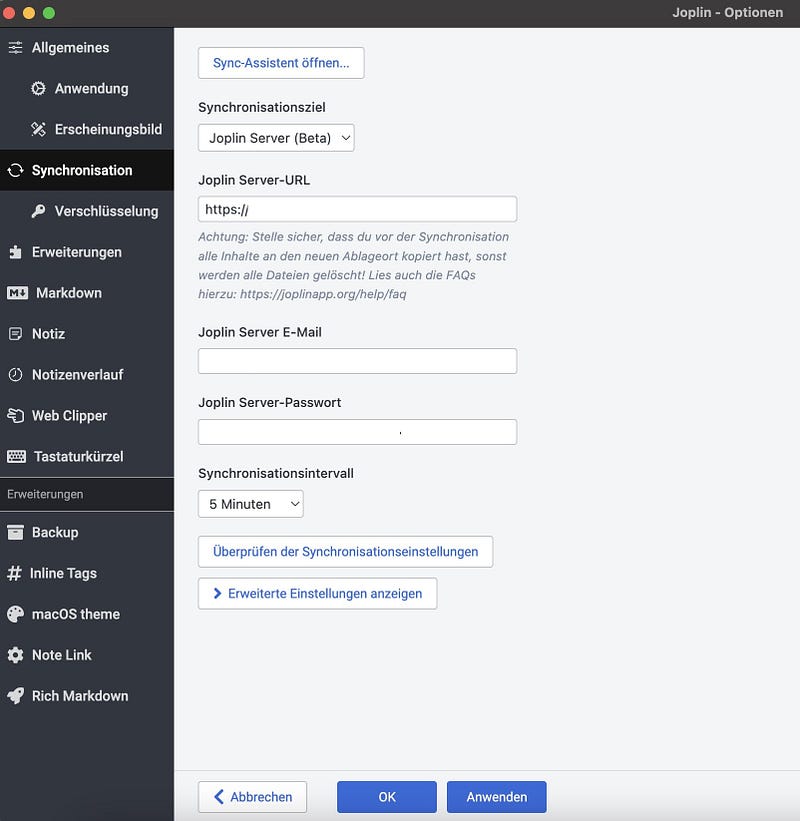
Once you have installed one of the official applications, simply open the configuration screen and go to the “Sync“-section. In this screen, select “Joplin Server” as the synchronization target, then enter your chosen URL including your username and password, test and/or save and you have successfully connected your client to your Joplin Server instance!
Of course there are still advanced options like the synchronization interval, how to handle attachments, proxy settings or the maximum number of concurrent connections to your Joplin Server:
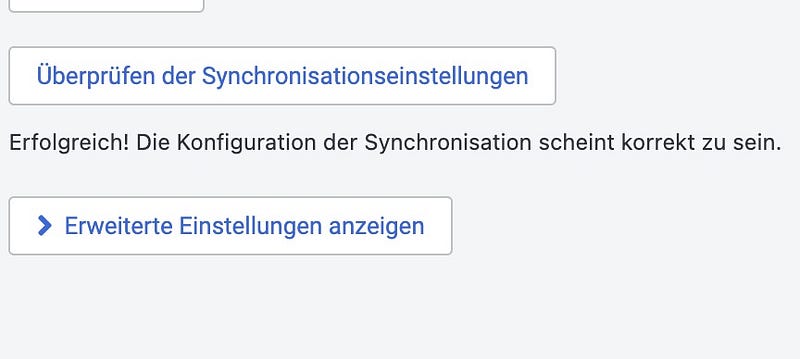
Fine-tuning is allowed here to meet your specific needs!
Verdict
We managed to install a self-hosted Joplin Server on a Debian VPS, reverse-proxied by Nginx Proxy Manager in no time and with less effort than expected. Your specific needs may be different and there are also other solutions in terms of a reverse proxy such as Nginx or Apache, so (of course) the choice is ultimately yours!