How to backup Microsoft 365 with Veeam and Wasabi
In our case, Microsoft provides this service and, albeit doing basic protectional work with recycle bins and a certain retention time, data…

In our case, Microsoft provides this service and, albeit doing basic protectional work with recycle bins and a certain retention time, data objects aren’t backup up in the ways modern backup standards propagate.
As for E-Mails, Calendars and Contacts (including SharePoint, OneDrive and Teams-data), the customer must be able to do a backup just like the whole environment would be hosted on-premises, being independent from the platform this specific data is hosted on.

Enter, Veeam! Veeam’s mission has been clear from the early days of virtualization and has seamlessly moved on into the world of hybrid IT these days: The task to own, control, backup and recover data anywhere in the hybrid cloud. The company took the cause of ensuring business resilience, protecting data from malicious actors and eliminating data loss and downtime while, confidently, moving to the cloud, avoiding lock‑in with cloud mobility. While Veeam delivers the software and does also assess the model of the shared responsibility from the company’s point of view, there is always the need for a certain backup repository containing the protected data. Over the time, Veeam constantly embraced Amazon’s S3-protocol and, likewise, similar solutions that found on this stack and this is where Wasabi enters the stage.
Delivering S3-capabilities for 1/5 of Amazon’s pricing without egress charges, Wasabi took the world of cloud storage by storm over the last years and, consequentially, advancing to a perfect match for Veeams underlying technology. This is where the circle is being closed and S3 can also be a direct backup target for storing your Microsoft 365-backups in combination with Veeam Backup for Microsoft 365. This tutorial will show you how to connect your Veeam Backup for Microsoft 365-console with Wasabi, assuming you have already installed the latest version ( 6.1.0.254 at the time of writing) so let’s start!
Wasabi: Creating the storage and dealing with permissions
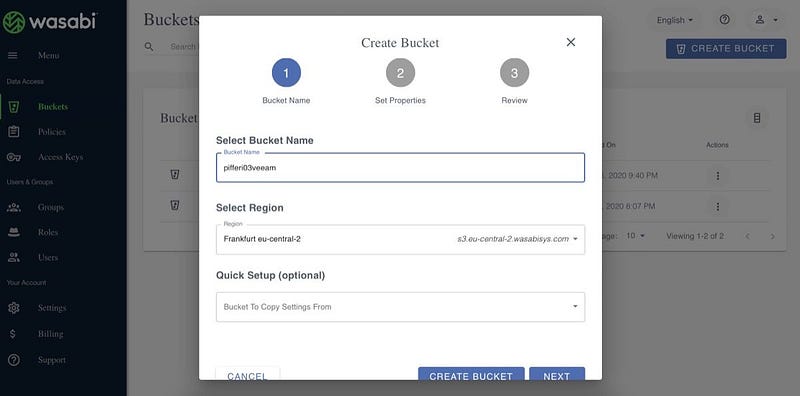
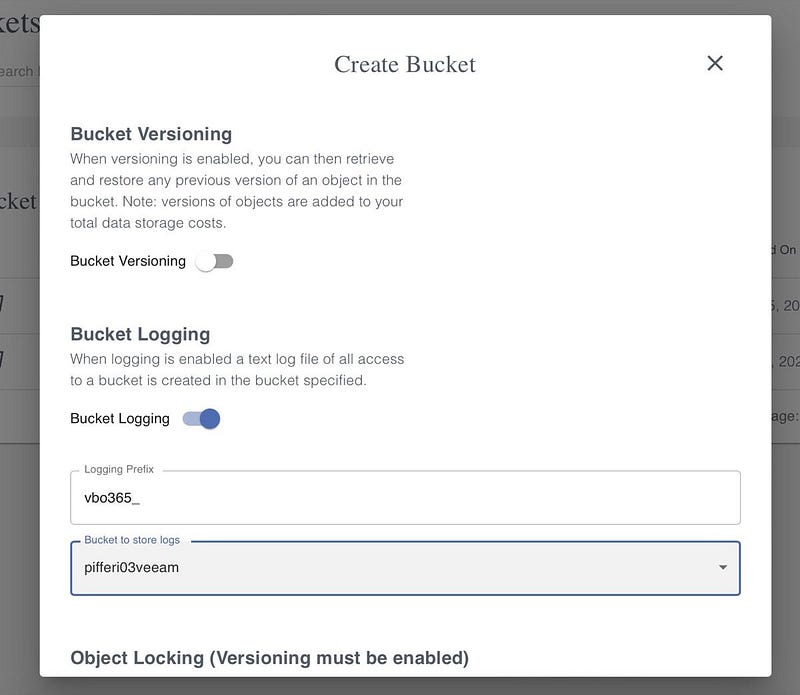
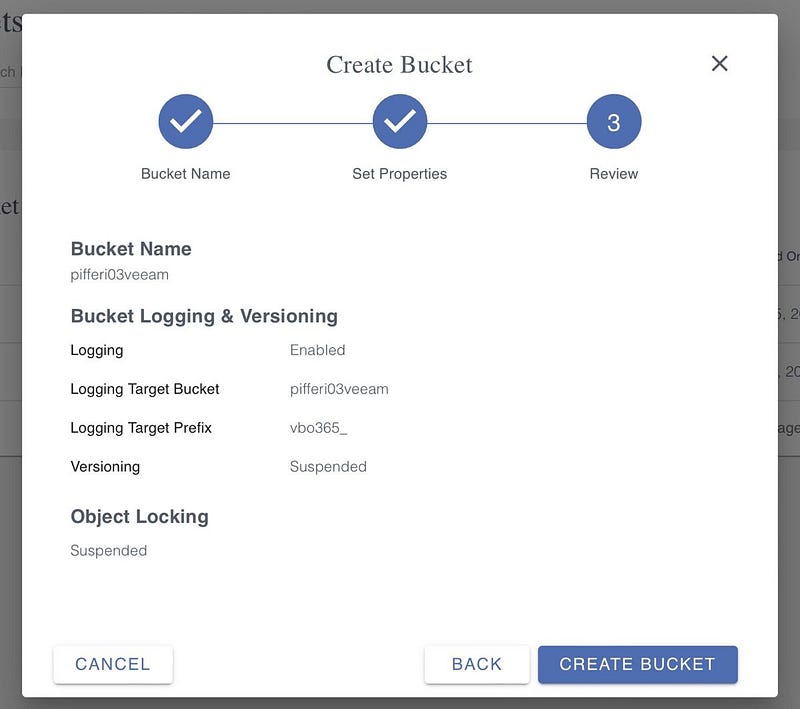
At first, we are going to create an own dedicated bucket with an own specific user for our backup job. This will be our extended backup repository within Veeam. Head to https://console.wasabisys.com/ and go to „Buckets”. Here, create a new bucket, give it a fitting name (here it follows my conventions, „pifferi03veeam”), choose your favorite region (mine is the eu-central-2 in Frankfurt, Germany) and whether you want additional options activated like, for example, bucket logging. After choosing all options, a summary screen will show what you have just chosen and you may finally choose „Create Bucket”.
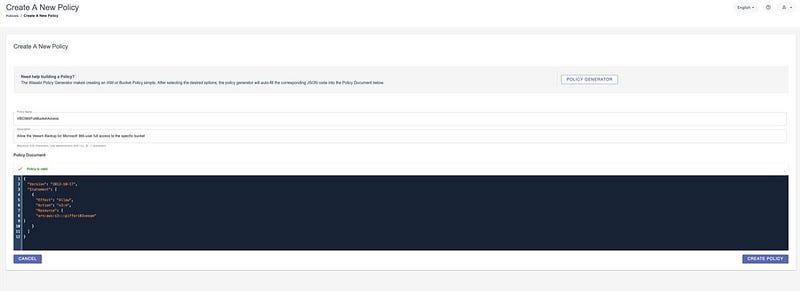
Second, we want to define a specific access policy to underline that just the specific user we are going to create in step three will have access to the freshly-created bucket.
Therefore, go to „Policies”, hit „Create Policy”, give it a unique name and a decent description and use the following code example (adopted to suit your bucket’s name under „Resource” — mine is „pifferi03veeam” here) as policy:
Once you typed everything in the correct syntax, the policy editor should show you a green „Policy is valid”-status and you may continue to finally finish creating this policy. To read what specific kinds of permissions you need to insert once you don’t want the predefined ones, this Veeam-article is quite helpful while a sample of my configuration may be found on GitHub!
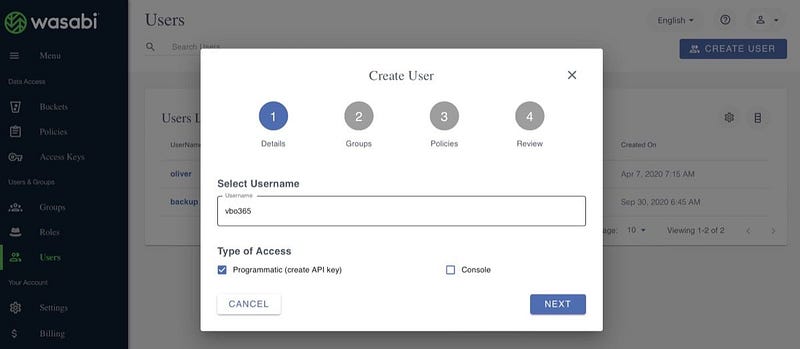
Third and finally, we are going to create a specific user for this bucket which acts as the link between Wasabi and Veeam. Head to the „Users”-pane and create new user with just „Programmatic” API-access — usually our backup-user doesn’t need console access!
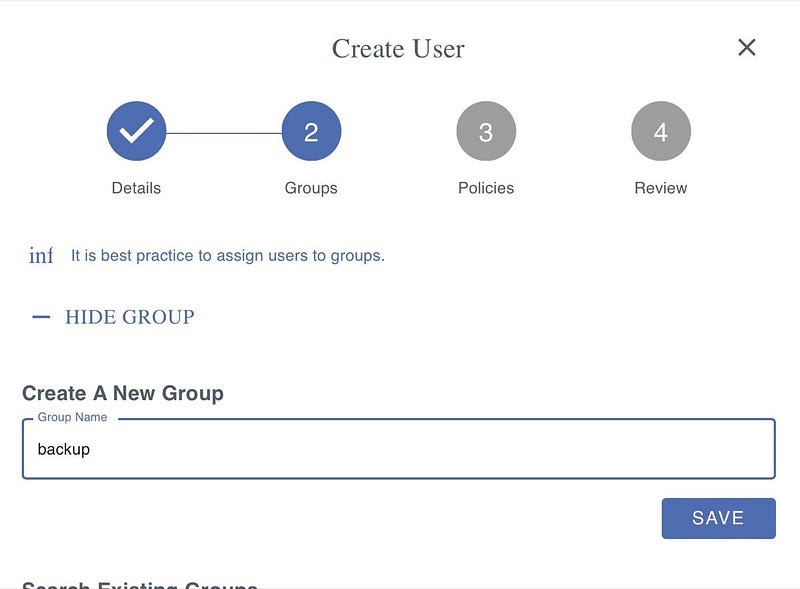
You may add this user to an existing group or create a new one — I chose the latter as I want to place my „vbo365"-user in the freshly-created „backup”-group.
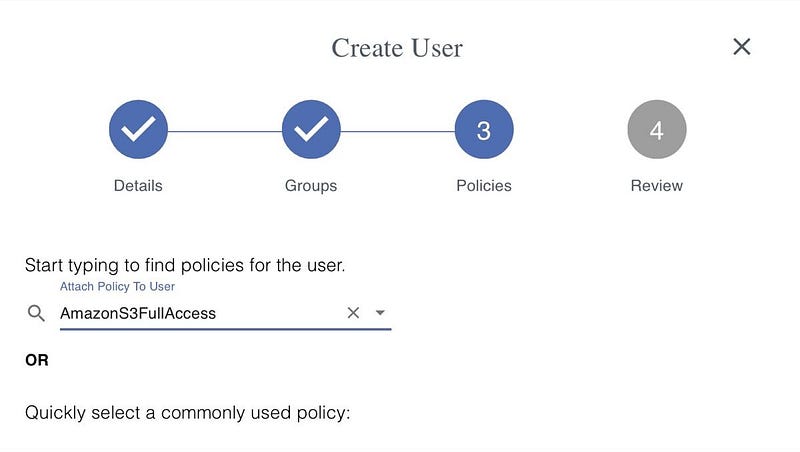
Continuing our journey here, the access policy must be set and while I opted in for the recently created „VBO365FullBucketAccess”-policy in my demo lab, your permissions and names may (of course) differ — the screenshot shows the generic „AmazonS3FullAccess”-permissions so don’t be confused!
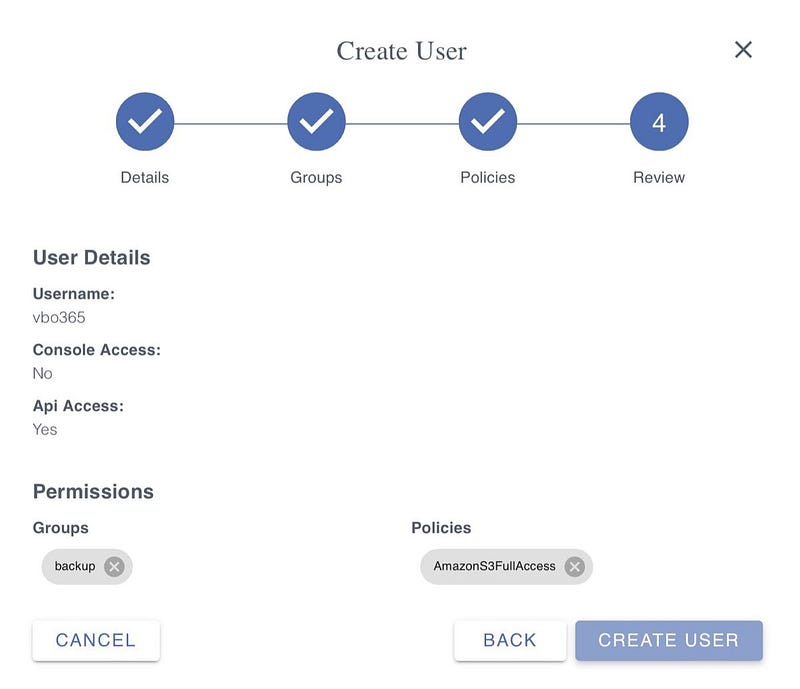
In the end, another overview is presented and the user can be created by hitting the „Create User”-button. Be sure to write down the access and secret key your new user will get here or download it as .CSV-file!
Connecting Wasabi to Veeam Backup for Microsoft 365
As we have dealt with all necessary prerequisites on Wasabi’s side, we can now carry off the bays with our previously installed Veeam Backup for Microsoft 365, combining the best of both (or three, if you bring Microsoft’s services into equation) worlds!
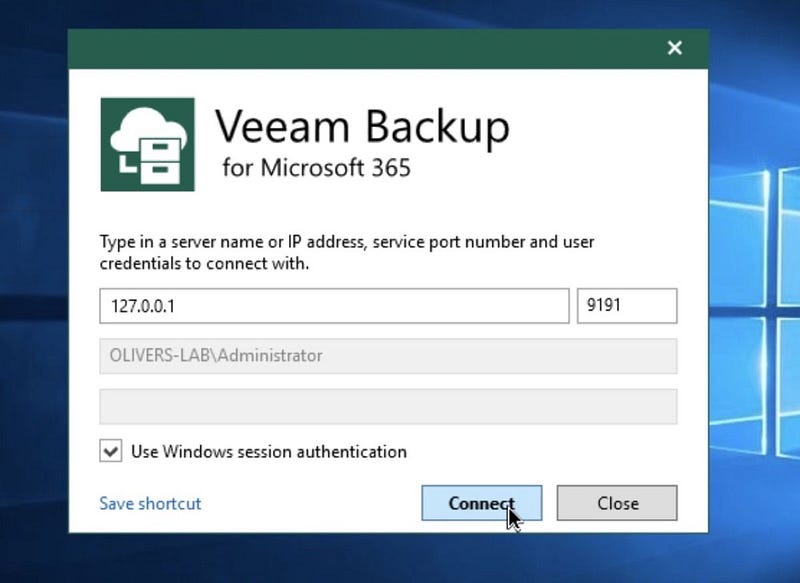
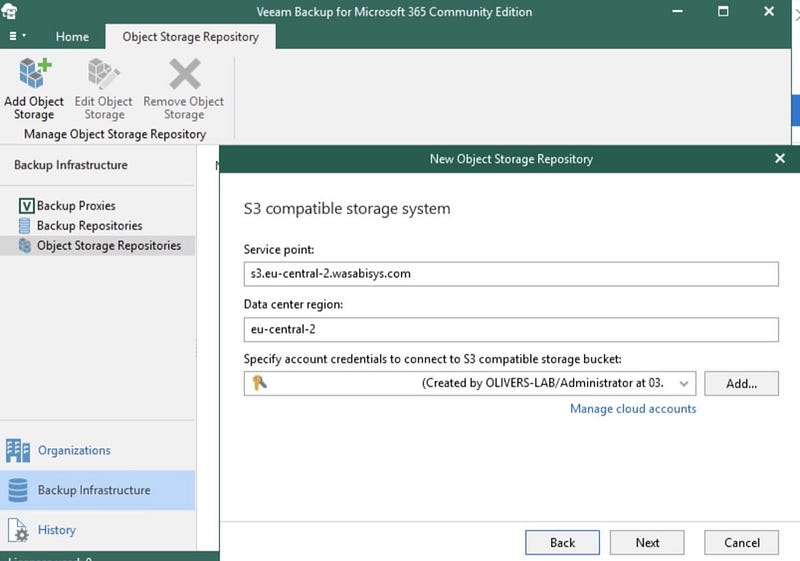
After the initial login, choose „Backup Infrastructure” in the left pane and „Object Storage Repositories” then. Here, create a new entry, give it a name and choose „S3 compatible” as object storage type.
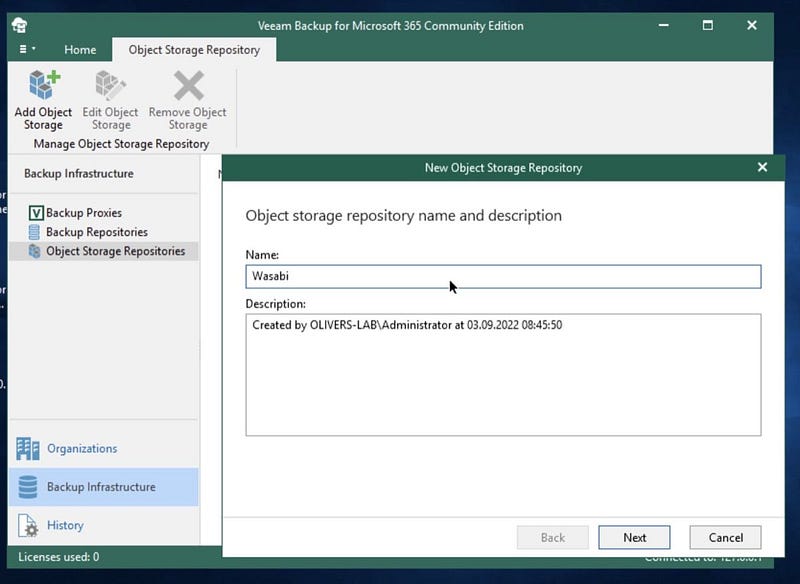

After continuing, the specific data needs to be entered. In our case, the data center region is „eu-central-2" while the resulting service point URL is s3.eu-central-2.wasabisys.com here.
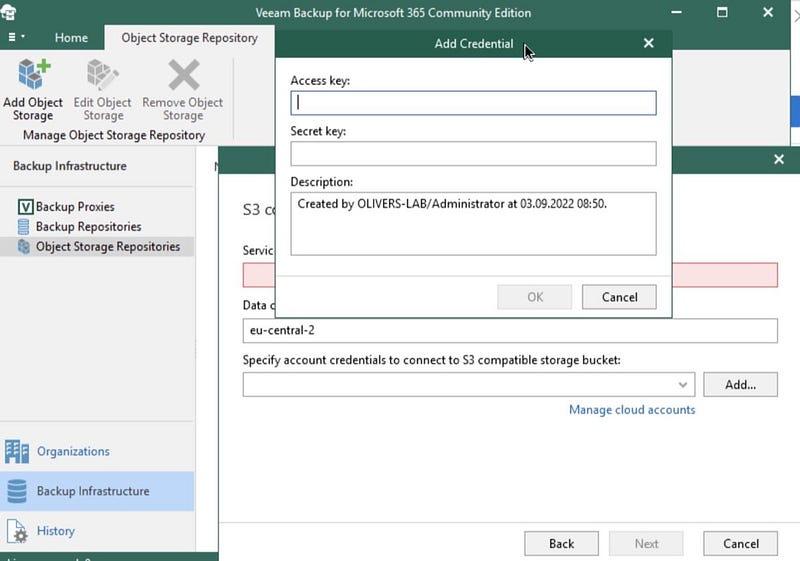
As for the credentials, hit the „Add”-button to enter the specific access and secret key from your freshly-created Wasabi-user account — hoping that you have written down or saved these credentials in the first part of the tutorial.
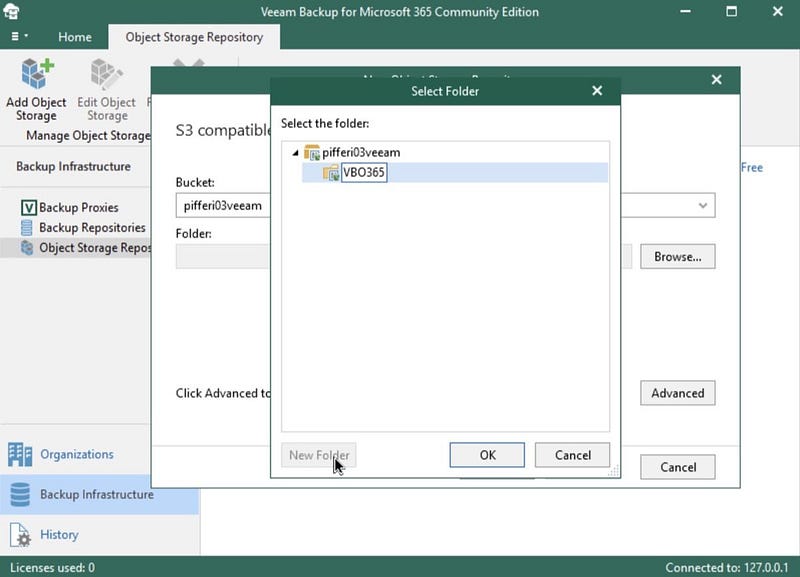
With entering these, your connection to your Wasabi-endpoint should be possible and, after verifying, you may choose the desired bucket and create a new, separate folder in it for Veeam Backup for Microsoft 365.
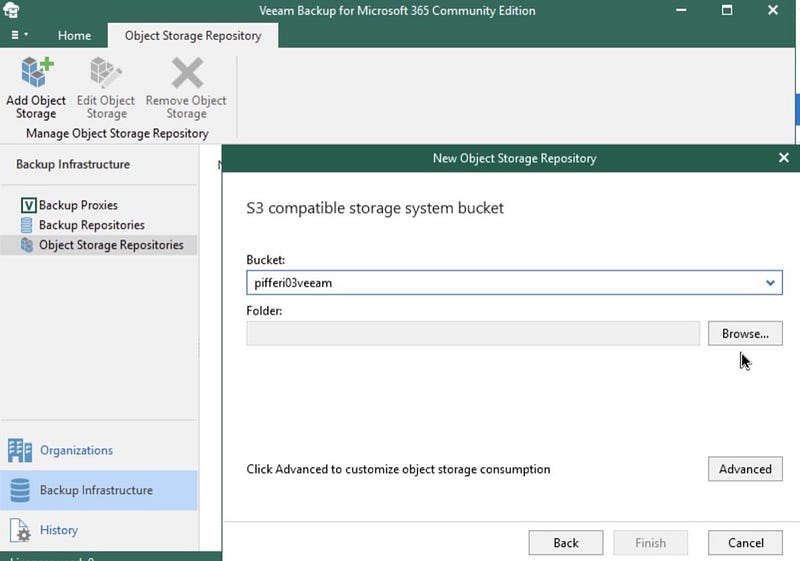
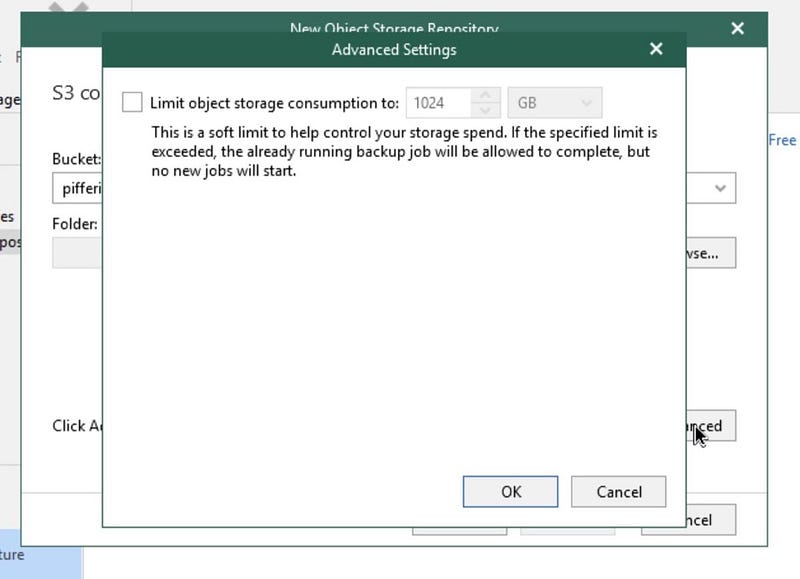
During this step, you may choose whether you want a limit on your bucket space consumption or not — remember that Wasabi charges in Terabyte-steps so once you’re short on budget (or want to keep the Microsoft 365-backup somehow limited, this is your option!
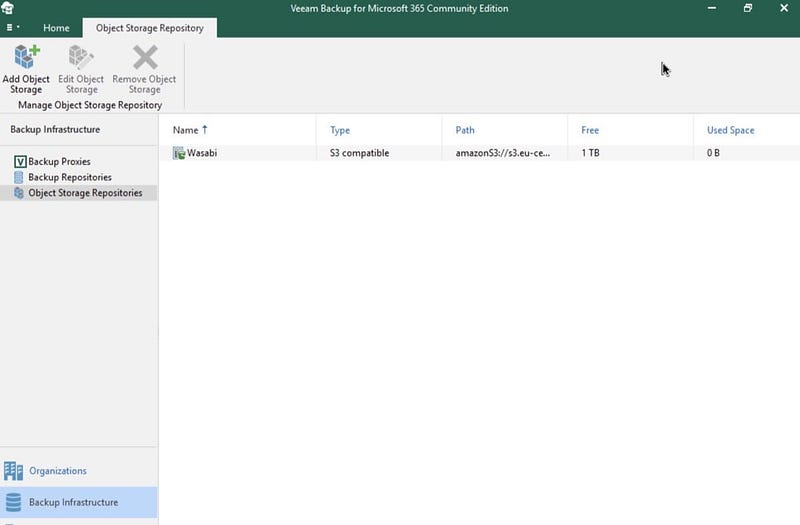
This is the last step needed to do before your Object Storage Repository is configured successfully!
Creating a backup job
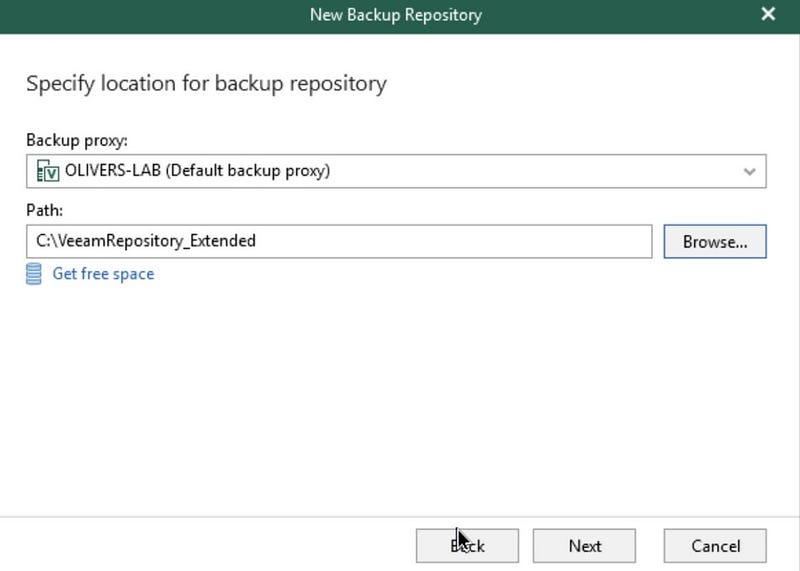
Before creating a new backup job, we need to define a local repository which is able to serve as an extended backup respository. Thus spoken, head to „Backup Infrastructure” on the left and create a new backup repository with an appropriate name.

Select a folder that should contain this repository — don’t mind it being entitled as „local” as Veeam backs up directly to the object storage keeping just a small amount of metadata cached on your local storage — which is, according to the company, about one percent of the data-backup.
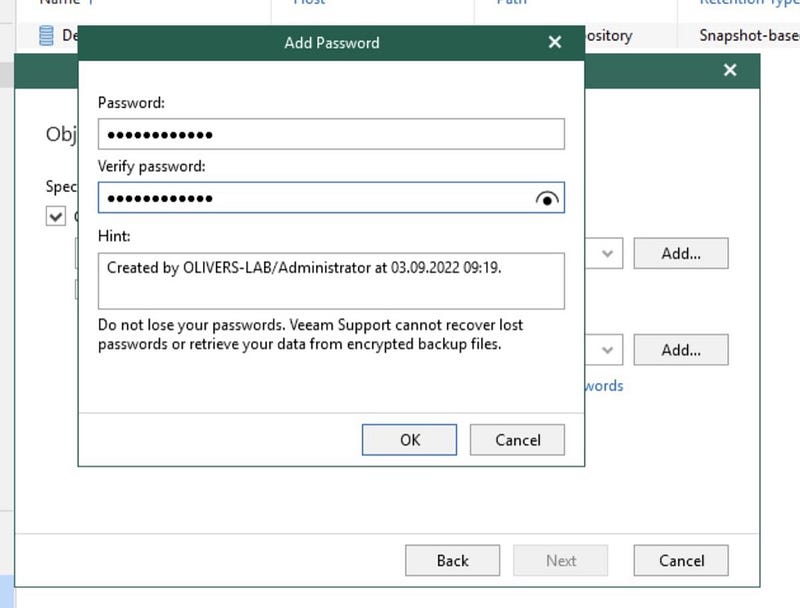
In the next step, select the checkbox „Offload backup data to object storage” and an encryption password so that your backup cannot be read on S3 no matter what.
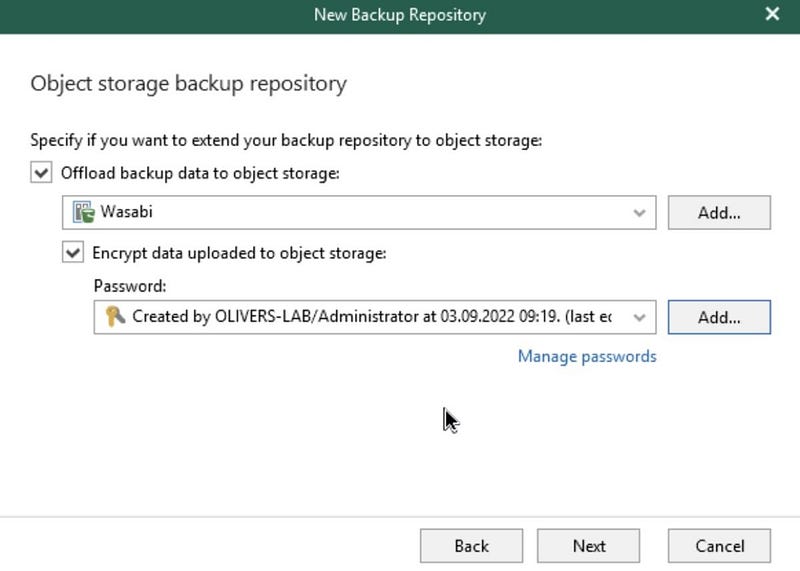
Write down this password or save it in a password manager and remember: Once you lose this encryption password, your scaled-out backups will become useless and even Veeam cannot help you here!
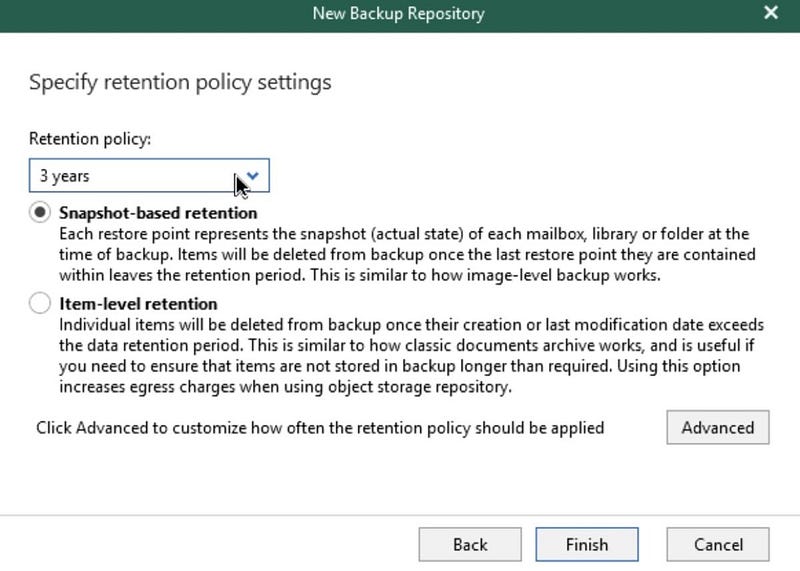
Finally, the retention policies of this repository can be set and that’s it — now we can deal with the backup job itself!
This process is as simple as straightforward just like we expect it from Veeam: Switch to your Microsoft 365-organization on the left side, right-click in the empty window on the right and opt to create a new backup job.
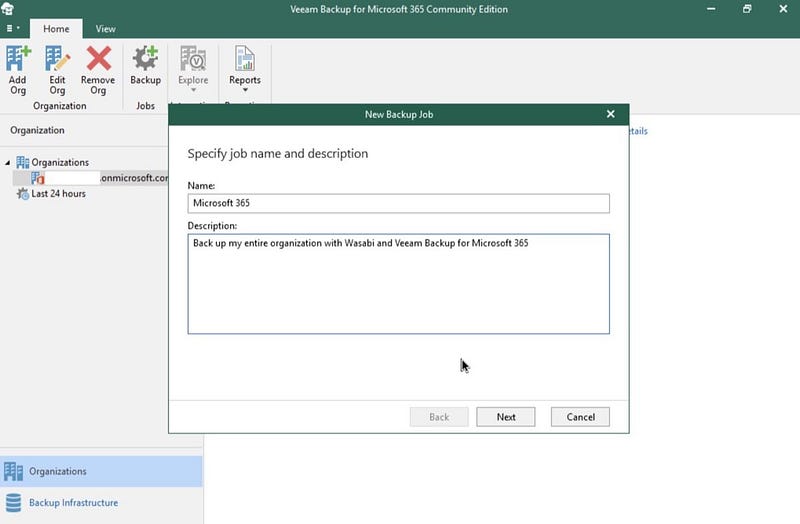
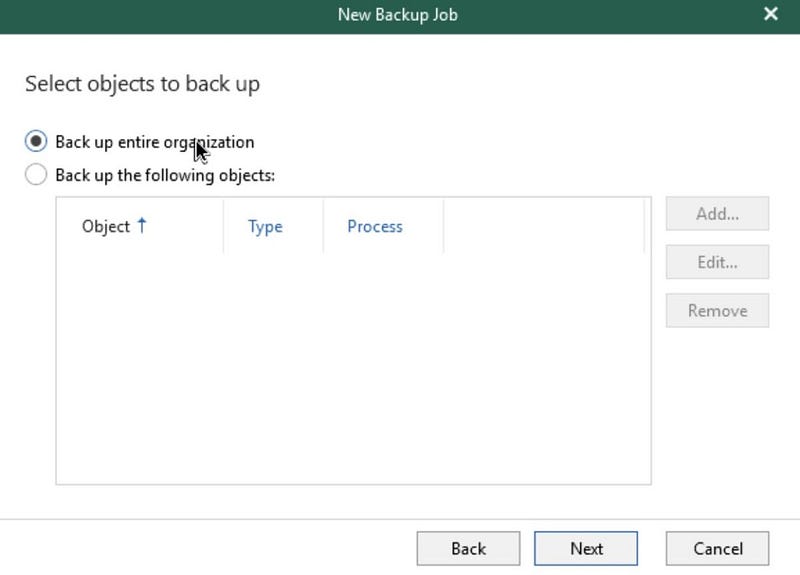
Choose a name and a description if you want and, in the next window, select whether you want to backup single objects or the entire organization and if you want to make exclusions to this job or not.
While the backup proxy should be the machine you are currently working with, you can — of course — choose other ones if you’ve split your proxies to work only for Exchange Online, OneDrive / SharePoint or Teams-data.

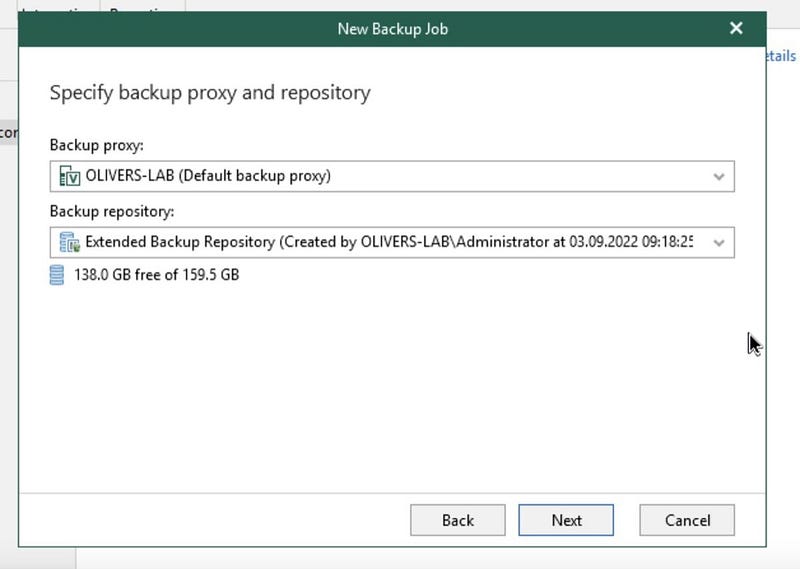
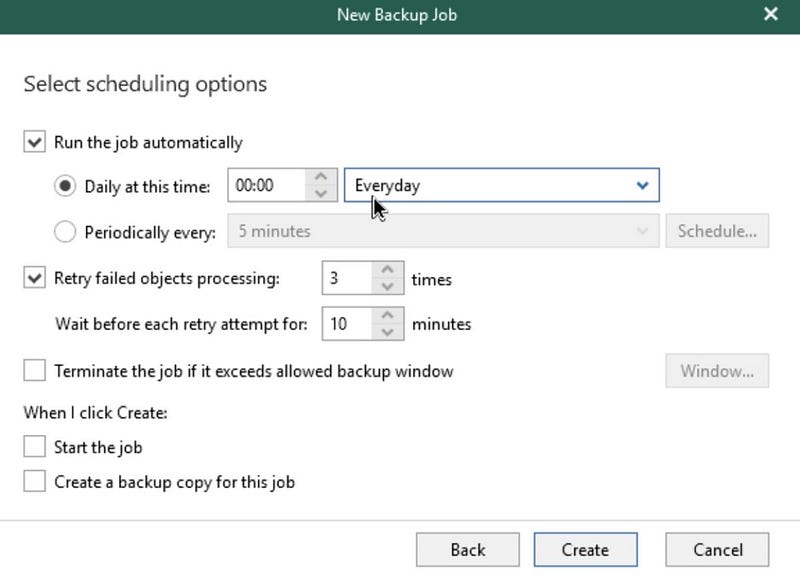
Choose the freshly-created extended backup repository as the target for this job and, finally, the scheduling options where you can also start this job for the first time after finishing the configuration.
Final Verdict
Following the steps of this tutorial, we have finally accomplished the creation of a certain S3-bucket in Wasabi and connected this dedicated cloud-based datastore to match our Veeam Backup for Microsoft 365-installation. Thus spoken, Veeam is no able to address this bucket as an extended repository and offload all Microsoft 365-backups straight to Wasabi. In terms of security, we have created a specific user, a specific group and a certain policy in Wasabi so that this bucket can only be accessed by our dedicated Wasabi-based access & secret key. As of Veeam, the backup itself is encrypted with an own key from within the Veeam-instance so our Microsoft 365-data got an appropriate and safe backup, making the combination of all three vendors a perfect match for an hybrid cloud environment and a baseline-backup strategy based upon Veeam’s market-leading strategy and Wasabi’s flexible and affordable embracement of the S3-protocol.
Short note: If you are unsure how much space you will need for your backup, Veeams official capacity calculator can help you here!
I hope you have enjoyed this tutorial and should you have any comments or suggestions, feel free to contact me or drop me a note via the contact form!